블로그 이미지
Every unexpected event is a path to learning for you.

카테고리

분류 전체보기 (2737)
Unity3D (817)
Programming (474)
Python (8)
TinyXML (5)
STL (13)
D3D (3)
MFC (1)
C/C++ (54)
C++/CLI (45)
C# (250)
WinForm (6)
WPF (5)
Math (10)
A.I. (1)
Win32API (11)
Algorithm (3)
Design Pattern (7)
UML (1)
MaxScript (1)
FMOD (4)
FX Studio (1)
Lua (2)
Terrain (1)
Shader (3)
boost (2)
Xml (2)
JSON (4)
Etc (11)
Monad (1)
Html5 (4)
Qt (1)
Houdini (0)
Regex (10)
Server (33)
Unreal (4)
Gamebryo (56)
Tip & Tech (228)
협업 (58)
3DS Max (3)
Game (12)
Utility (136)
Etc (96)
Link (32)
Portfolio (19)
Subject (90)
iOS,OSX (53)
Android (14)
Linux (5)
잉여 프로젝트 (2)
게임이야기 (3)
Memories (20)
Interest (38)
Thinking (38)
한글 (30)
PaperCraft (5)
Animation (408)
Wallpaper (2)
재테크 (18)
Exercise (3)
나만의 맛집 (3)
냥이 (10)
육아 (16)
Total
Today
Yesterday
04-27 00:02

C# WinForm "인증서 저장소에서 매니페스트 서명 인증서를 찾을 수 없습니다."

예전에 작업 했던 소스를 불러오면 에러 한두개 쯤은 당연하게 뜬다.
이번에는 "인증서 저장소에서 매니페스트 서명 인증서를 찾을 수 없습니다." ... 가 뜬다.


이건 찾아보니 그냥 ClickOnce 설정만 지워주면 된다고 한다.

"프로젝트" > "속성" 에서....


"서명" 탭의 "ClickOnce 매니페스트 서명" 의 체크를 해제 한다.


나의 경우는 이것만 해도 해결이 되었지만...
"보안" 탭에도 "ClickOnce 보안 설정 사용" 이라는 항목이 있는데, 이것도 해제해 주자.


이렇게 하면 일단 잘 실행이 된다.


[출처] http://son10001.blogspot.com/2015/03/c-winform_26.html

반응형

'Programming > WinForm' 카테고리의 다른 글

Load a Cursor from a Resources in C#  (0) 2014.11.07
BackGroundWorker 예제 ( Thread 대용품 )  (0) 2014.11.04
BackgroundWorker 클래스  (0) 2014.11.04
쓰레드 선호도 (Thread Affinity)  (0) 2014.11.03
Cursors in C#  (0) 2014.11.03
Posted by blueasa
, |

WinForm에서 커서 파일을 Resources에 넣고 쓰는 방법(VS2013 한글판 기준)


[설정]

1. 프로젝트-(맨아래)프로젝트 속성 Click or 솔루션 탐색기-해당 프로젝트에서 우클릭-속성 Click

2. 리소스-리소스 추가(R) 우측의 화살표 Click

3. 기존 파일 추가(E) Click

4. 원하는 커서 파일(*.cur) 선택해서 추가.(예: Arrow.cur 추가)


[사용방법]

5. 커서를 사용하는 곳에 대입.

    예) Cursor myCursor = new Cursor(new System.IO.MemoryStream(Properties.Resources.Arrow));


참조 : http://csharphelper.com/blog/2013/03/load-a-cursor-from-a-resource-in-c/

반응형
Posted by blueasa
, |

주의 : 자칫 폼을 죽일 수 있음. 14 - 5 - 8 일 작성한 Thread 예제 사용 가능 

thread 사용에는 form 내부의 control에 접근하기 어려운 점들이 있다. 

progress Bar 나 text Box 등 접근해서 처리했으면 하는 것들이 있는데 

이를 해결하기 위해 C#에 존재하는 것이 BackGroundWorker 이다. 

Thread 와 동일하게 Work, Complete 가 존재하며, 

특별히 progressChanged 라는 것을 통해서 

Progress Bar 를 좀 더 편하게 처리할 수 있다. 

  1. BackgroundWorker backgroundWorker1 = new BackgroundWorker();  
  2.   
  3. public Form1()  
  4. {  
  5.     InitializeComponent();  
  6.   
  7.     backgroundWorker1.DoWork += new DoWorkEventHandler(Work);  
  8.     backgroundWorker1.ProgressChanged += new ProgressChangedEventHandler(ProgressB);  
  9.     backgroundWorker1.RunWorkerCompleted += new RunWorkerCompletedEventHandler(CompleteWork);  
  10.   
  11.     // progress 사용 유무  
  12.     backgroundWorker1.WorkerReportsProgress = true;  
  13.   
  14.     progressBar1.Maximum = 100000;  
  15. }  


위 소스와 같이 BackGroundWorker 를 선언하고, Work(), ProgressB(), CompleteWork()를 각기 선언해준다. 

Work() 는 실제로 BackGround 상에서 수행해야 할 작업을 넣어두면 된다. 

  1. private void Work(object sender, DoWorkEventArgs e)  
  2. {  
  3.     for (int i = 0; i < 100000; i++)  
  4.     {  
  5.         backgroundWorker1.ReportProgress(i);  
  6.     }  
  7. }  


위는 ReportProgress 를 통해서 bar 를 움직이는 work 이다. 

  1. private void ForForFor(object sender, DoWorkEventArgs e)  
  2. {  
  3.     for (int i = 0; i < 100000; i++)  
  4.     {  
  5.         backgroundWorker1.ReportProgress(i);  
  6.     }  
  7. }  


ProgressChangedEvent 인 ProgressB 는 

  1. private void ProgressB(object sender, ProgressChangedEventArgs e)  
  2. {  
  3.     progressBar1.Value = e.ProgressPercentage;  
  4. }  


위와 같이 나타나며, backgroundWorker1.ReportProgress(i) 로 처리가 가능하다. 

마지막으로 CompleteWork() 이며 

  1. private void CompleteWork(object sender, RunWorkerCompletedEventArgs e)  
  2. {  
  3.     if (e.Cancelled == true)  
  4.     {  
  5.   
  6.     }  
  7.     else if (e.Error != null)  
  8.     {  
  9.   
  10.     }  
  11.     else  
  12.     {  
  13.   
  14.     }  
  15. }  


으로 나타낼 수 있다. Cancell 과 Error 등의 상황으로 예외처리가 가능하고 

마지막 else 는 정상적인 처리가 끝났을 때, 무언가 처리를 하고 싶을 때 하면 된다. 

BackGroundWorker를 시작하고 싶을 때는 

  1. private void button1_Click(object sender, EventArgs e)  
  2. {  
  3.     backgroundWorker1.RunWorkerAsync();  
  4. }  


RunWorkerAsync() 를 통해서 시작하면~ 끗.


출처 : http://onlyican.tistory.com/221

반응형
Posted by blueasa
, |

BackgroundWorker 클래스

.NET Framework 4.5
이 항목은 아직 평가되지 않았습니다.이 항목 평가

별도의 스레드에서 작업을 실행합니다.

System.Object 
  System.MarshalByRefObject
    System.ComponentModel.Component
      System.ComponentModel.BackgroundWorker

네임스페이스:  System.ComponentModel
어셈블리:  System(System.dll)

[HostProtectionAttribute(SecurityAction.LinkDemand, SharedState = true)]
public class BackgroundWorker : Component

BackgroundWorker 형식에서는 다음과 같은 멤버를 노출합니다.

표시: 
 이름설명
Public 메서드BackgroundWorkerBackgroundWorker 클래스의 새 인스턴스를 초기화합니다.
위쪽

표시: 
 이름설명
Public 속성CancellationPending응용 프로그램에서 백그라운드 작업의 취소를 요청했는지 여부를 나타내는 값을 가져옵니다.
Protected 속성CanRaiseEvents구성 요소가 이벤트를 발생시킬 수 있는지 여부를 나타내는 값을 가져옵니다.(Component에서 상속됨)
Public 속성ContainerComponent 가 포함된 IContainer를 가져옵니다. (Component에서 상속됨)
Protected 속성DesignModeComponent 가 현재 디자인 모드인지 여부를 나타내는 값을 가져옵니다.(Component에서 상속됨)
Protected 속성Events이 Component에 연결된 이벤트 처리기의 목록을 가져옵니다. (Component에서 상속됨)
Public 속성IsBusyBackgroundWorker 가 비동기 작업을 실행하고 있는지 여부를 나타내는 값을 가져옵니다.
Public 속성SiteComponent 의 ISite를 가져오거나 설정합니다. (Component에서 상속됨)
Public 속성WorkerReportsProgressBackgroundWorker 가 진행률 업데이트를 보고할 수 있는지 여부를 나타내는 값을 가져오거나 설정합니다.
Public 속성WorkerSupportsCancellationBackgroundWorker 가 비동기 취소를 지원하는지 여부를 나타내는 값을 가져오거나 설정합니다.
위쪽

표시: 
 이름설명
Public 메서드CancelAsync보류 중인 백그라운드 작업의 취소를 요청합니다.
Public 메서드CreateObjRef원격 개체와 통신하는 데 사용되는 프록시 생성에 필요한 모든 관련 정보가 들어 있는 개체를 만듭니다. (MarshalByRefObject에서 상속됨)
Public 메서드Dispose()Component 에서 사용하는 모든 리소스를 해제합니다. (Component에서 상속됨)
Protected 메서드Dispose(Boolean)Component 에서 사용하는 관리되지 않는 리소스를 해제하고, 관리되는 리소스를 선택적으로 해제할 수 있습니다. (Component에서 상속됨)
Public 메서드Equals(Object)지정한 개체가 현재 개체와 같은지 여부를 확인합니다. (Object에서 상속됨)
Protected 메서드Finalize가비지 수집에 의해 Component가 회수되기 전에 관리되지 않는 리소스를 해제하고 기타 정리 작업을 수행합니다. (Component에서 상속됨)
Public 메서드GetHashCode기본 해시 함수로 작동합니다. (Object에서 상속됨)
Public 메서드GetLifetimeService이 인스턴스의 수명 정책을 제어하는 현재의 수명 서비스 개체를 검색합니다.(MarshalByRefObject에서 상속됨)
Protected 메서드GetServiceComponent 또는 해당 Container에서 제공하는 서비스를 나타내는 개체를 반환합니다. (Component에서 상속됨)
Public 메서드GetType현재 인스턴스의 Type을 가져옵니다. (Object에서 상속됨)
Public 메서드InitializeLifetimeService이 인스턴스의 수명 정책을 제어하기 위한 수명 서비스 개체를 가져옵니다.(MarshalByRefObject에서 상속됨)
Protected 메서드MemberwiseClone()현재 Object의 단순 복사본을 만듭니다. (Object에서 상속됨)
Protected 메서드MemberwiseClone(Boolean)현재 MarshalByRefObject 개체의 단순 복사본을 만듭니다. (MarshalByRefObject에서 상속됨)
Protected 메서드OnDoWorkDoWork 이벤트를 발생시킵니다.
Protected 메서드OnProgressChangedProgressChanged 이벤트를 발생시킵니다.
Protected 메서드OnRunWorkerCompletedRunWorkerCompleted 이벤트를 발생시킵니다.
Public 메서드ReportProgress(Int32)ProgressChanged 이벤트를 발생시킵니다.
Public 메서드ReportProgress(Int32, Object)ProgressChanged 이벤트를 발생시킵니다.
Public 메서드RunWorkerAsync()백그라운드 작업의 실행을 시작합니다.
Public 메서드RunWorkerAsync(Object)백그라운드 작업의 실행을 시작합니다.
Public 메서드ToStringComponent 의 이름이 포함된 String을 반환합니다. 이 메서드는 재정의할 수 없습니다. (Component에서 상속됨)
위쪽

표시: 
 이름설명
Public 이벤트DisposedDispose 메서드를 호출하여 구성 요소가 삭제되는 경우 발생합니다. (Component에서 상속됨)
Public 이벤트DoWorkRunWorkerAsync 가 호출될 때 발생합니다.
Public 이벤트ProgressChangedReportProgress 가 호출될 때 발생합니다.
Public 이벤트RunWorkerCompleted백그라운드 작업이 완료되거나 취소되거나 예외를 발생시켰을 때 발생합니다.
위쪽

BackgroundWorker 클래스를 사용하면 별도의 전용 스레드에서 작업을 실행할 수 있습니다. 다운로드 및 데이터베이스 트랜잭션과 같은 시간이 많이 걸리는 작업이 실행되는 동안에는 UI(사용자 인터페이스)가 응답을 중지한 것처럼 보일 수 있습니다. UI의 응답 속도를 높이려 하고 이러한 작업과 관련된 지연 시간이 길어지는 경우 BackgroundWorker 클래스는 간편한 해결책을 제공합니다.

백그라운드에서 시간이 많이 걸리는 작업을 실행하려면 BackgroundWorker를 만든 다음 작업의 진행률을 보고하고 작업이 끝날 때 알리는 이벤트를 수신합니다. 프로그래밍 방식으로 BackgroundWorker를 만들거나 이 개체를 도구 상자의 구성 요소 탭에서 폼으로 끌어 올 수 있습니다. Windows Forms 디자이너에서 BackgroundWorker를 만들면 이 개체가 구성 요소 트레이에 나타나고 해당 속성이 속성 창에 표시됩니다.

백그라운드 작업에 대해 설정하려면 DoWork 이벤트에 대한 이벤트 처리기를 추가해야 합니다. 완료하는 데 시간이 많이 걸리는 작업을 이 이벤트 처리기로 호출합니다. 작업을 시작하려면 RunWorkerAsync를 호출합니다. 진행률 업데이트 알림을 받으려면ProgressChanged 이벤트를 처리합니다. 작업이 완료될 때 알림을 받으려면 RunWorkerCompleted 이벤트를 처리합니다.

참고참고

DoWork 이벤트 처리기에서 사용자 인터페이스 개체를 조작하지 않도록 주의해야 합니다. 대신 ProgressChanged 및RunWorkerCompleted 이벤트를 통해 사용자 인터페이스와 통신합니다.

BackgroundWorker 이벤트는 AppDomain 경계를 넘어 마샬링되지 않습니다. BackgroundWorker 구성 요소를 사용하여 둘 이상의AppDomain에서 다중 스레드 작업을 수행하지 마십시오.

백그라운드 작업에 매개 변수가 필요하면 매개 변수를 사용하여 RunWorkerAsync를 호출합니다. DoWork 이벤트 처리기 안에 있는DoWorkEventArgs.Argument 속성에서 매개 변수를 추출할 수 있습니다.

BackgroundWorker 에 대한 자세한 내용은 방법: 백그라운드에서 작업 실행을 참조하십시오.

참고참고

이 형식 또는 멤버에 적용되는 HostProtectionAttribute 특성의 Resources 속성 값은 SharedState입니다. HostProtectionAttribute는 대개 아이콘을 두 번 클릭하거나, 명령을 입력하거나, 브라우저에서 URL을 입력하여 시작되는 데스크톱 응용 프로그램에 영향을 미치지 않습니다. 자세한 내용은 HostProtectionAttribute 클래스 또는 SQL Server 프로그래밍 및 호스트 보호 특성을 참조하십시오.

다음 코드 예제에서는 BackgroundWorker 클래스의 기본 사항을 통해 시간이 많이 걸리는 작업을 비동기적으로 실행하는 방법을 보여 줍니다. 다음 그림에서는 출력의 예제를 보여 줍니다.

BackgroundWorker 간단한 예제

이 코드를 시도하려면 Windows Forms 응용 프로그램을 만듭니다. resultLabel이라는 이름의 Label 컨트롤을 추가하고startAsyncButton 및 cancelAsyncButton이라는 이름의 두 개의 Button 컨트롤을 추가합니다. 두 단추에 대한 Click 이벤트 처리기를 만듭니다. 도구 상자의 구성 요소 탭에서 backgroundWorker1이라는 이름의 BackgroundWorker 구성 요소를 추가합니다.BackgroundWorker 에 대한 DoWorkProgressChanged 및 RunWorkerCompleted 이벤트 처리기를 만듭니다. 폼에 대한 코드에서 기존 코드를 다음 코드로 바꿉니다.

using System;
using System.ComponentModel;
using System.Windows.Forms;

namespace BackgroundWorkerSimple
{
    public partial class Form1 : Form
    {
        public Form1()
        {
            InitializeComponent();
            backgroundWorker1.WorkerReportsProgress = true;
            backgroundWorker1.WorkerSupportsCancellation = true;
        }

        private void startAsyncButton_Click(object sender, EventArgs e)
        {
            if (backgroundWorker1.IsBusy != true)
            {
                // Start the asynchronous operation.
                backgroundWorker1.RunWorkerAsync();
            }
        }

        private void cancelAsyncButton_Click(object sender, EventArgs e)
        {
            if (backgroundWorker1.WorkerSupportsCancellation == true)
            {
                // Cancel the asynchronous operation.
                backgroundWorker1.CancelAsync();
            }
        }

        // This event handler is where the time-consuming work is done.
        private void backgroundWorker1_DoWork(object sender, DoWorkEventArgs e)
        {
            BackgroundWorker worker = sender as BackgroundWorker;

            for (int i = 1; i <= 10; i++)
            {
                if (worker.CancellationPending == true)
                {
                    e.Cancel = true;
                    break;
                }
                else
                {
                    // Perform a time consuming operation and report progress.
                    System.Threading.Thread.Sleep(500);
                    worker.ReportProgress(i * 10);
                }
            }
        }

        // This event handler updates the progress.
        private void backgroundWorker1_ProgressChanged(object sender, ProgressChangedEventArgs e)
        {
            resultLabel.Text = (e.ProgressPercentage.ToString() + "%");
        }

        // This event handler deals with the results of the background operation.
        private void backgroundWorker1_RunWorkerCompleted(object sender, RunWorkerCompletedEventArgs e)
        {
            if (e.Cancelled == true)
            {
                resultLabel.Text = "Canceled!";
            }
            else if (e.Error != null)
            {
                resultLabel.Text = "Error: " + e.Error.Message;
            }
            else
            {
                resultLabel.Text = "Done!";
            }
        }
    }
}


다음 코드 예제에서는 BackgroundWorker 클래스를 사용하여 시간이 많이 걸리는 작업을 비동기적으로 실행하는 방법을 보여 줍니다.다음 그림에서는 출력의 예제를 보여 줍니다.

BackgroundWorker 피보나치 예제

작업에서는 선택된 피바노치(Fibonacci) 수를 계산하고 계산이 진행됨에 따라 진행률 업데이트를 보고하며 보류 중인 계산을 취소할 수 있도록 합니다.

using System;
using System.Collections;
using System.ComponentModel;
using System.Drawing;
using System.Threading;
using System.Windows.Forms;

namespace BackgroundWorkerExample
{	
    public class FibonacciForm : System.Windows.Forms.Form
    {	
        private int numberToCompute = 0;
        private int highestPercentageReached = 0;

        private System.Windows.Forms.NumericUpDown numericUpDown1;
        private System.Windows.Forms.Button startAsyncButton;
        private System.Windows.Forms.Button cancelAsyncButton;
        private System.Windows.Forms.ProgressBar progressBar1;
        private System.Windows.Forms.Label resultLabel;
        private System.ComponentModel.BackgroundWorker backgroundWorker1;

        public FibonacciForm()
        {	
            InitializeComponent();

            InitializeBackgroundWorker();
        }

        // Set up the BackgroundWorker object by 
        // attaching event handlers. 
        private void InitializeBackgroundWorker()
        {
            backgroundWorker1.DoWork += 
                new DoWorkEventHandler(backgroundWorker1_DoWork);
            backgroundWorker1.RunWorkerCompleted += 
                new RunWorkerCompletedEventHandler(
            backgroundWorker1_RunWorkerCompleted);
            backgroundWorker1.ProgressChanged += 
                new ProgressChangedEventHandler(
            backgroundWorker1_ProgressChanged);
        }
	
        private void startAsyncButton_Click(System.Object sender, 
            System.EventArgs e)
        {
            // Reset the text in the result label.
            resultLabel.Text = String.Empty;

            // Disable the UpDown control until 
            // the asynchronous operation is done.
            this.numericUpDown1.Enabled = false;

            // Disable the Start button until 
            // the asynchronous operation is done.
            this.startAsyncButton.Enabled = false;

            // Enable the Cancel button while 
            // the asynchronous operation runs.
            this.cancelAsyncButton.Enabled = true;

            // Get the value from the UpDown control.
            numberToCompute = (int)numericUpDown1.Value;

            // Reset the variable for percentage tracking.
            highestPercentageReached = 0;

            // Start the asynchronous operation.
            backgroundWorker1.RunWorkerAsync(numberToCompute);
        }

        private void cancelAsyncButton_Click(System.Object sender, 
            System.EventArgs e)
        {   
            // Cancel the asynchronous operation.
            this.backgroundWorker1.CancelAsync();

            // Disable the Cancel button.
            cancelAsyncButton.Enabled = false;
        }

        // This event handler is where the actual,
        // potentially time-consuming work is done.
        private void backgroundWorker1_DoWork(object sender, 
            DoWorkEventArgs e)
        {   
            // Get the BackgroundWorker that raised this event.
            BackgroundWorker worker = sender as BackgroundWorker;

            // Assign the result of the computation
            // to the Result property of the DoWorkEventArgs
            // object. This is will be available to the 
            // RunWorkerCompleted eventhandler.
            e.Result = ComputeFibonacci((int)e.Argument, worker, e);
        }

        // This event handler deals with the results of the
        // background operation.
        private void backgroundWorker1_RunWorkerCompleted(
            object sender, RunWorkerCompletedEventArgs e)
        {
            // First, handle the case where an exception was thrown.
            if (e.Error != null)
            {
                MessageBox.Show(e.Error.Message);
            }
            else if (e.Cancelled)
            {
                // Next, handle the case where the user canceled 
                // the operation.
                // Note that due to a race condition in 
                // the DoWork event handler, the Cancelled
                // flag may not have been set, even though
                // CancelAsync was called.
                resultLabel.Text = "Canceled";
            }
            else
            {
                // Finally, handle the case where the operation 
                // succeeded.
                resultLabel.Text = e.Result.ToString();
            }

            // Enable the UpDown control.
            this.numericUpDown1.Enabled = true;

            // Enable the Start button.
            startAsyncButton.Enabled = true;

            // Disable the Cancel button.
            cancelAsyncButton.Enabled = false;
        }

        // This event handler updates the progress bar.
        private void backgroundWorker1_ProgressChanged(object sender,
            ProgressChangedEventArgs e)
        {
            this.progressBar1.Value = e.ProgressPercentage;
        }

        // This is the method that does the actual work. For this
        // example, it computes a Fibonacci number and
        // reports progress as it does its work.
        long ComputeFibonacci(int n, BackgroundWorker worker, DoWorkEventArgs e)
        {
            // The parameter n must be >= 0 and <= 91.
            // Fib(n), with n > 91, overflows a long.
            if ((n < 0) || (n > 91))
            {
                throw new ArgumentException(
                    "value must be >= 0 and <= 91", "n");
            }

            long result = 0;

            // Abort the operation if the user has canceled.
            // Note that a call to CancelAsync may have set 
            // CancellationPending to true just after the
            // last invocation of this method exits, so this 
            // code will not have the opportunity to set the 
            // DoWorkEventArgs.Cancel flag to true. This means
            // that RunWorkerCompletedEventArgs.Cancelled will
            // not be set to true in your RunWorkerCompleted
            // event handler. This is a race condition.

            if (worker.CancellationPending)
            {   
                e.Cancel = true;
            }
            else
            {   
                if (n < 2)
                {   
                    result = 1;
                }
                else
                {   
                    result = ComputeFibonacci(n - 1, worker, e) + 
                             ComputeFibonacci(n - 2, worker, e);
                }

                // Report progress as a percentage of the total task.
                int percentComplete = 
                    (int)((float)n / (float)numberToCompute * 100);
                if (percentComplete > highestPercentageReached)
                {
                    highestPercentageReached = percentComplete;
                    worker.ReportProgress(percentComplete);
                }
            }

            return result;
        }


		#region Windows Form Designer generated code
		
        private void InitializeComponent()
        {
            this.numericUpDown1 = new System.Windows.Forms.NumericUpDown();
            this.startAsyncButton = new System.Windows.Forms.Button();
            this.cancelAsyncButton = new System.Windows.Forms.Button();
            this.resultLabel = new System.Windows.Forms.Label();
            this.progressBar1 = new System.Windows.Forms.ProgressBar();
            this.backgroundWorker1 = new System.ComponentModel.BackgroundWorker();
            ((System.ComponentModel.ISupportInitialize)(this.numericUpDown1)).BeginInit();
            this.SuspendLayout();
            // 
            // numericUpDown1
            // 
            this.numericUpDown1.Location = new System.Drawing.Point(16, 16);
            this.numericUpDown1.Maximum = new System.Decimal(new int[] {
            91,
            0,
            0,
            0});
            this.numericUpDown1.Minimum = new System.Decimal(new int[] {
            1,
            0,
            0,
            0});
            this.numericUpDown1.Name = "numericUpDown1";
            this.numericUpDown1.Size = new System.Drawing.Size(80, 20);
            this.numericUpDown1.TabIndex = 0;
            this.numericUpDown1.Value = new System.Decimal(new int[] {
            1,
            0,
            0,
            0});
            // 
            // startAsyncButton
            // 
            this.startAsyncButton.Location = new System.Drawing.Point(16, 72);
            this.startAsyncButton.Name = "startAsyncButton";
            this.startAsyncButton.Size = new System.Drawing.Size(120, 23);
            this.startAsyncButton.TabIndex = 1;
            this.startAsyncButton.Text = "Start Async";
            this.startAsyncButton.Click += new System.EventHandler(this.startAsyncButton_Click);
            // 
            // cancelAsyncButton
            // 
            this.cancelAsyncButton.Enabled = false;
            this.cancelAsyncButton.Location = new System.Drawing.Point(153, 72);
            this.cancelAsyncButton.Name = "cancelAsyncButton";
            this.cancelAsyncButton.Size = new System.Drawing.Size(119, 23);
            this.cancelAsyncButton.TabIndex = 2;
            this.cancelAsyncButton.Text = "Cancel Async";
            this.cancelAsyncButton.Click += new System.EventHandler(this.cancelAsyncButton_Click);
            // 
            // resultLabel
            // 
            this.resultLabel.BorderStyle = System.Windows.Forms.BorderStyle.Fixed3D;
            this.resultLabel.Location = new System.Drawing.Point(112, 16);
            this.resultLabel.Name = "resultLabel";
            this.resultLabel.Size = new System.Drawing.Size(160, 23);
            this.resultLabel.TabIndex = 3;
            this.resultLabel.Text = "(no result)";
            this.resultLabel.TextAlign = System.Drawing.ContentAlignment.MiddleCenter;
            // 
            // progressBar1
            // 
            this.progressBar1.Location = new System.Drawing.Point(18, 48);
            this.progressBar1.Name = "progressBar1";
            this.progressBar1.Size = new System.Drawing.Size(256, 8);
            this.progressBar1.Step = 2;
            this.progressBar1.TabIndex = 4;
            // 
            // backgroundWorker1
            // 
            this.backgroundWorker1.WorkerReportsProgress = true;
            this.backgroundWorker1.WorkerSupportsCancellation = true;
            // 
            // FibonacciForm
            // 
            this.ClientSize = new System.Drawing.Size(292, 118);
            this.Controls.Add(this.progressBar1);
            this.Controls.Add(this.resultLabel);
            this.Controls.Add(this.cancelAsyncButton);
            this.Controls.Add(this.startAsyncButton);
            this.Controls.Add(this.numericUpDown1);
            this.Name = "FibonacciForm";
            this.Text = "Fibonacci Calculator";
            ((System.ComponentModel.ISupportInitialize)(this.numericUpDown1)).EndInit();
            this.ResumeLayout(false);

        }
		#endregion

        [STAThread]
        static void Main()
        {
            Application.Run(new FibonacciForm());
        }
    }
}


.NET Framework

4.5.2, 4.5.1, 4.5, 4, 3.5, 3.0, 2.0에서 지원

.NET Framework Client Profile

4, 3.5 SP1에서 지원

Windows Phone 앱용 .NET

Windows Phone 8, Silverlight 8.1에서 지원

Windows Phone 8.1, Windows Phone 8, Windows 8.1, Windows Server 2012 R2, Windows 8, Windows Server 2012, Windows 7, Windows Vista SP2, Windows Server 2008(서버 코어 역할은 지원되지 않음), Windows Server 2008 R2(서버 코어 역할은 SP1 이상에서 지원, Itanium은 지원되지 않음)

.NET Framework에서 모든 플랫폼의 전체 버전을 지원하지는 않습니다. 지원되는 버전의 목록을 보려면 .NET Framework 시스템 요구 사항을 참조하십시오.

이 형식의 모든 공용 static(Visual Basic의 경우 Shared) 멤버는 스레드로부터 안전합니다. 인터페이스 멤버는 스레드로부터 안전하지 않습니다.

참조

기타 리소스


반응형
Posted by blueasa
, |
쓰레드 선호도 (Thread Affinity) 

.NET에서 UI Application을 만들기 위해 Windows Forms(윈폼)이나 WPF (Windows Presentation Foundation)을 사용한다. 이들 WinForm이나 WPF는 그 UI 컨트롤을 생성한 쓰레드만(UI 쓰레드)이 해당 UI 객체를 엑세스할 수 있다는 쓰레드 선호도(Thread Affinity) 규칙을 지키도록 설계되었다. 만약 개발자 이러한 기본 규칙을 따르지 않는다면, 에러가 발생하거나 예기치 못한 오동작을 할 수 있다. UI 컨트롤을 생성하고 이 컨트롤의 윈도우 핸들을 소유한 쓰레드를 UI Thread라 부르고, 이러한 UI 컨트롤들을 갖지 않는 쓰레드를 작업쓰레드 (Worker Thread)라 부른다. 일반적으로 UI 프로그램은 하나의 UI Thread (주로 메인쓰레드)를 가지며, 여러 개의 작업 쓰레드를 갖는다. 하지만 필요한 경우 여러 개의 UI 쓰레드를 갖게 하는 것도 가능하다. 


윈폼 UI Thread 

WinForm의 UI 컨트롤들은 Control 클래스로부터 파생된 클래스들이며, Control 클래스는 UI 컨트롤이 UI 쓰레드에서 돌고 있는지를 체크하는 InvokeRequired 속성을 갖고 있으며, 만약 작업쓰레드에서 실행되고 있는 경우 Control클래스의 Invoke()나 BeginInvoke() 메소드를 사용하여 UI 쓰레드로 작업 요청을 보낸다. 

예제

using System;
using System.Windows.Forms;
using System.Threading;

namespace MultiThrdApp
{
    public partial class Form1 : Form
    {
        public Form1()
        {
            InitializeComponent();
        }

        private void btnQuery_Click(object sender, EventArgs e)
        {
            // 작업 쓰레드 시작
            Thread worker = new Thread(Run);
            worker.Start();
        }

        private void btnClear_Click(object sender, EventArgs e)
        {
            // UI 쓰레드에서 TextBox 갱신
            UpdateTextBox(string.Empty);
        }

        private void Run()
        { 
            // Long DB query
            Thread.Sleep(3000);
            string dbData = "Query Result";

            // 작업쓰레드에서 TextBox 갱신
            UpdateTextBox(dbData);
        }

        private void UpdateTextBox(string data)
        {
            // 호출한 쓰레드가 작업쓰레드인가?
            if (textBox1.InvokeRequired)
            {
                // 작업쓰레드인 경우
                textBox1.BeginInvoke(new Action(() => textBox1.Text = data));
            }
            else 
            {
                // UI 쓰레드인 경우
                textBox1.Text = data;
            }            
        }
    }
}


WPF UI Thread 

WPF는 DependencyObject에 기반한 UI Element들을 사용하는데, 해당 쓰레드가 UI 컨트롤을 소유하는 쓰레드인지를 체크하는 Dispatcher.CheckAccess() 메서드가 있으며, 만약 다른 쓰레드인 경우 Dispatcher.Invoke()나 Dispatcher.BeginInvoke()를 사용하여 UI 쓰레드로 작업 요청을 보낸다. 

예제

using System;
using System.Windows;
using System.Threading.Tasks;

namespace WpfApp
{
    /// <summary>
    /// Interaction logic for MainWindow.xaml
    /// </summary>
    public partial class MainWindow : Window
    {
        public MainWindow()
        {
            InitializeComponent();
        }

        private void button1_Click(object sender, RoutedEventArgs e)
        {
            // 작업쓰레드 생성
            Task.Factory.StartNew(Run);            
        }

        private void Run()
        {
            // 해당 쓰레드가 UI쓰레드인가?
            if (textBox1.Dispatcher.CheckAccess())
            {
                //UI 쓰레드인 경우
                textBox1.Text = "Data";
            }
            else
            {
                // 작업쓰레드인 경우
                textBox1.Dispatcher.BeginInvoke(new Action(Run));
            }
        }
    }
}


출처 : http://csharpstudy.com/Threads/uithread.aspx

반응형
Posted by blueasa
, |

Cursors in C#

Programming/WinForm / 2014. 11. 3. 03:29


Link : http://www.c-sharpcorner.com/UploadFile/mahesh/cursors-in-C-Sharp/


A cursor in Windows is an icon that is displayed when you move a mouse, a pen, or a trackball. Usually, a different cursor image is displayed for different activity. For instance, the default cursor is different than a wait cursor.

Cursors may be different for different operating systems. Figure 1 displays some of the cursors available on machine loaded with Windows 7 operating system. As you can presume from Figure 1, the Default cursor is loaded most of the time, the AppStarting cursor is displayed when any application is starting and loading, and the Size cursors are loaded when you are resizing an application.
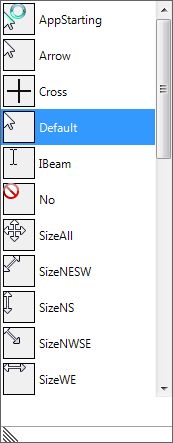
CursorsImg1.jpg
Figure 1

Windows Forms allows us to change this cursor image using the Cursor and its related classes and enumerations.

 
In this article, I will demonstrate how to apply and manage cursors in your Windows Forms applications.
 
Setting Cursor of Controls 

In Windows Forms, all Windows controls are derived from the Control class. The Control class has a Cursor property that represents a cursor respective to that control. That means, each control can have its own cursor. So the default cursor on a Form can be different than the default cursor on a child control on the same Form. The Cursor property is of type Cursors class. For example, the following code snippet sets default cursor of a Button and a ListBox control to Hand and No respectively. So when you rollover on button1 control, you will see hand cursor and when you rollover on listBox1 control, you will see a No cursor. You may use the same approach to define a cursor for any control. 

C# Code
 
button1.Cursor = Cursors.Hand;

listBox1.Cursor =Cursors.No;

VB.NET Code:
 

button1.Cursor = Cursors.Hand

listBox1.Cursor = Cursors.No

 
Cursors Class 

The Cursors class provides a set of cursors that can be used in Windows Forms. Each cursor is represented by a static property. Here is a list of cursors with brief description as described in MSDN.  
  • AppStarting - Gets the cursor that appears when an application starts.
  • Arrow - Gets the arrow cursor.
  • Cross - Gets the crosshair cursor.
  • Default - Gets the default cursor, which is usually an arrow cursor.
  • Hand - Gets the hand cursor, typically used when hovering over a Web link.
  • Help - Gets the Help cursor, which is a combination of an arrow and a question mark.
  • HSplit - Gets the cursor that appears when the mouse is positioned over a horizontal splitter bar.
  • IBeam - Gets the I-beam cursor, which is used to show where the text cursor appears when the mouse is clicked.
  • No - Gets the cursor that indicates that a particular region is invalid for the current operation.
  • NoMove2D - Gets the cursor that appears during wheel operations when the mouse is not moving, but the window can be scrolled in both a horizontal and vertical direction.
  • NoMoveHoriz - Gets the cursor that appears during wheel operations when the mouse is not moving, but the window can be scrolled in a horizontal direction.
  • NoMoveVert - Gets the cursor that appears during wheel operations when the mouse is not moving, but the window can be scrolled in a vertical direction.
  • PanEast - Gets the cursor that appears during wheel operations when the mouse is not moving, but the window can be scrolled in a horizontal direction.
  • PanNE - Gets the cursor that appears during wheel operations when the mouse is moving and the window is scrolling horizontally to the right.
  • PanNorth - Gets the cursor that appears during wheel operations when the mouse is moving and the window is scrolling horizontally and vertically upward and to the right.
  • PanNE - Gets the cursor that appears during wheel operations when the mouse is moving and the window is scrolling vertically in an upward direction.
  • PanNW - Gets the cursor that appears during wheel operations when the mouse is moving and the window is scrolling horizontally and vertically upward and to the left.
  • PanSE - Gets the cursor that appears during wheel operations when the mouse is moving and the window is scrolling horizontally and vertically downward and to the right.
  • PanSouth - Gets the cursor that appears during wheel operations when the mouse is moving and the window is scrolling vertically in a downward direction..
  • PanSW Gets the cursor that appears during wheel operations when the mouse is moving and the window is scrolling horizontally and vertically downward and to the left.
  • PanWest - Gets the cursor that appears during wheel operations when the mouse is moving and the window is scrolling horizontally to the left.
  • SizeAll - Gets the four-headed sizing cursor, which consists of four joined arrows that point north, south, east, and west.
  • SizeNESW - Gets the two-headed diagonal (northeast/southwest) sizing cursor
  • SizeNS - Gets the two-headed vertical (north/south) sizing cursor.
  • SizeNWSE - Gets the two-headed diagonal (northwest/southeast) sizing cursor.
  • SizeWE - Gets the two-headed horizontal (west/east) sizing cursor.
  • UpArrow - Gets the up arrow cursor, typically used to identify an insertion point.
  • VSplit - Gets the cursor that appears when the mouse is positioned over a vertical splitter bar.
  • WaitCursor - Gets the wait cursor, typically an hourglass shape.

Creating a Cursor 

Cursor is not a typical Windows Forms control. It is used as a helper control and does not have a user interface or design view. The Cursor class represents a cursor and it is created either using the Cursors class or load a cursor form a file. The following code snippet creates a cursor.

C# Code: 
 

Cursor cur = Cursors.WaitCursor;

this.Cursor = cur;

  
VB.NET Code:


Dim cur As Cursor = Cursors.WaitCursor

Me.Cursor = cur

Creating and Loading Custom Cursors 

Visual Studio allows you to create cursor (.cur) files. A cursor file is a bitmap file with .cur extension. To create a cursor file, right click on your project and select Add New Item menu item. After that, select Cursor File from the items. This action will add a default Cursor1.cur file. See Figure 2. 
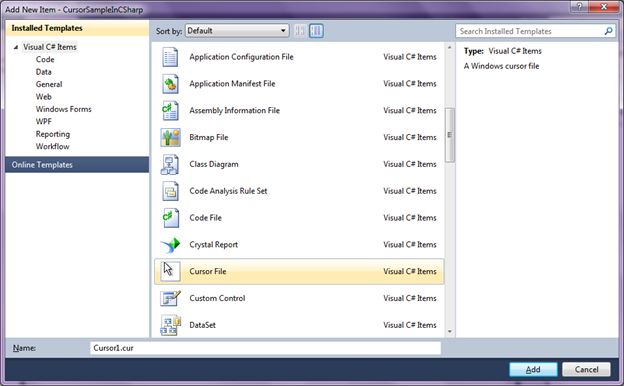
CursorsImg2.jpg
Figure 2

Once a cursor file is added, you will land in bitmap editor where you can change the bitmap using drawing tools as you can see in Figure 3. 
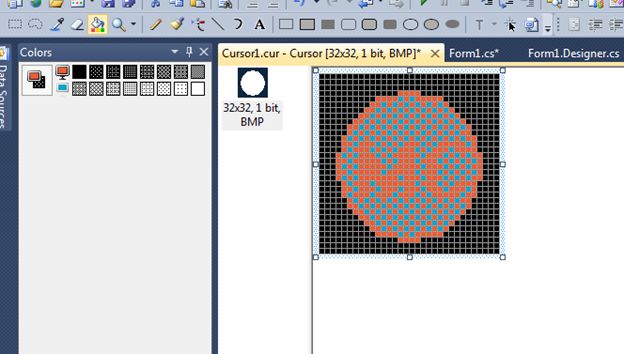
CursorsImg3.jpg
Figure 3
 

Once you're done editing your file, save it. 

Now copy Cursor1.cur file to your Debug or Release folder where your executable file is stored. 

Once a file is saved, we can create a cursor from the cursor file using following code snippet.

C# Code:


this
.Cursor = new Cursor(Application.StartupPath +  "\\Cursor1.cur");  

VB.NET Code:
 

Me.Cursor = New Cursor(Application.StartupPath + "\Cursor1.cur") 

Current Cursor 

Cursor.Current static property gets and sets the current cursor. The following code snippet gets and sets the current cursor. 


C# Code:
 

this.Cursor = Cursor.Current; 

VB.NET Code:


Me.Cursor = Cursor.Current 

Move a Cursor Position 

The Position property of Cursor class is used to change the position of a cursor.

The following code snippet moves a cursor from its current position to 150 pixels less in both directions. 

C# Code:
 

Cursor.Position = new Point(Cursor.Position.X - 150, Cursor.Position.Y - 150); 


VB.NET Code:
 

Cursor.Position = New Point(Cursor.Position.X - 150, Cursor.Position.Y - 150) 

Show and Hide a Cursor 

The Hide and Show static methods of Cursor class are used to hide and show a cursor in a Windows application. The following code snippet hides and displays a cursor. 

C# Code:


Cursor.Hide();

Cursor.Show(); 

VB.NET Code:


Cursor.Hide()

Cursor.Show() 

Set and Change Current Cursor 

There are occasions when you need to change cursors based on some activity. For example, if you have a lengthy file copy or processing operation, you may want uses to wait and display a wait cursor for that. But once the processing is done, you change the cursor back the default cursor.

 
The following code snippet shows how to do the same. Before processing, set the cursor is set to the wait cursor and once the processing is done, the cursor is set to the default cursor. 

C# Code:
 

this.Cursor = Cursors.WaitCursor;

// Do something here

this.Cursor = Cursors.Default; 

VB.NET Code:


Me.Cursor = Cursors.WaitCursor

Me.Cursor = Cursors.Default


Summary 

In this article, I discussed how to create and user cursors in your Windows Forms applications. We also discussed how to create custom cursors and set other cursor properties.

반응형
Posted by blueasa
, |