Microsoft Visual Studio에서 boost 사용하기
1. 여기에서 Boost installer 를 다운받습니다.
2. Boost installer 를 실행하면 license agreement 거치고 난 후, 어디에서 다운 받을 것인지 묻습니다.
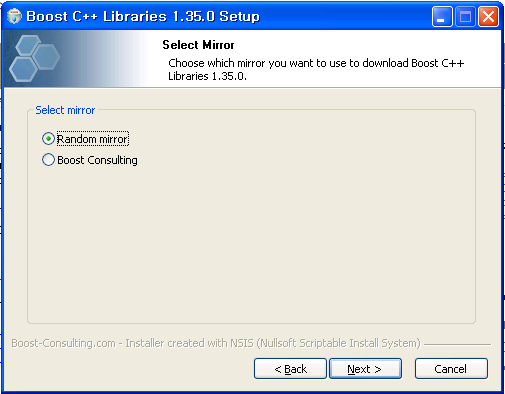
boost installer
3. 그럼 자신의 개발 환경과 어떤 구성을 설치할 것인지 묻습니다.
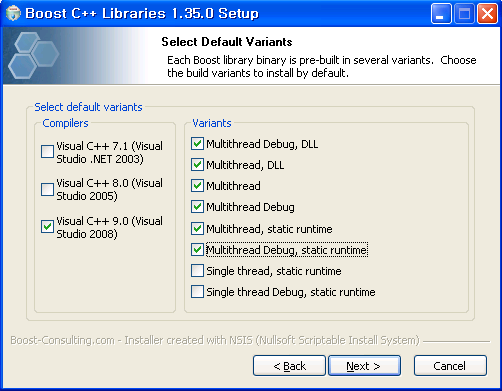
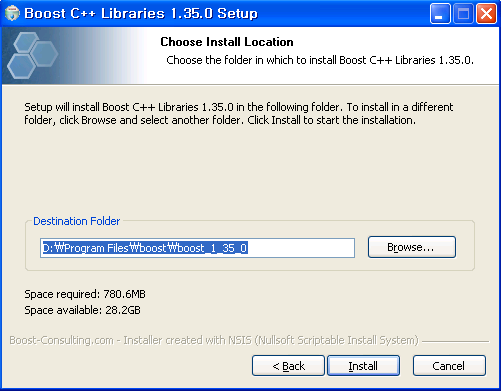
4. 그리고 나면 어느 디렉토리에 설치할 것인지 묻고(디폴트는 C:\Program Files\boost\boost_1_35_0 입니다)
5. 그리고 나면 설치를 시작합니다.
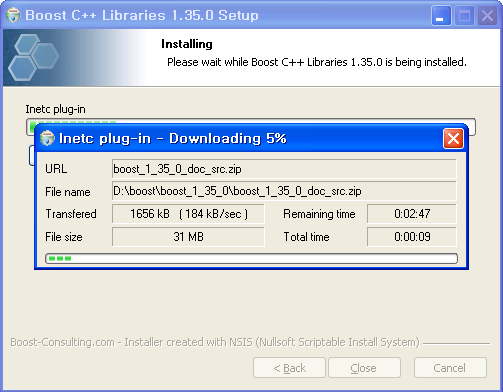
6. 설치가 끝나고 나면 Visual Studio 설정을 해줘야 합니다.
도구->옵션->프로젝트 및 솔루션->VC++ 디렉토리 를 선택하신 후에 포함 파일(Include directories) 및 라이브러리 파일(Library directories)을 각각 다음과 같이 설정하시면 됩니다.
C:\Program Files\boost\boost_1_35_0
C:\Program Files\boost\boost_1_35_0\lib
(당연히 C:\Program Files\boost\boost_1_35_0 를 4단계에서 여러분이 선택한 디렉토리로 바꿔주시면 됩니다)
7. Visual Studio 설정이 끝나면 한 번 제대로 설정이 됐는지 확인해 봐야겠지요. 먼저 boostex 라는 이름으로 Win32 콘솔 응용 프로그램 프로젝트를 생성합니다.
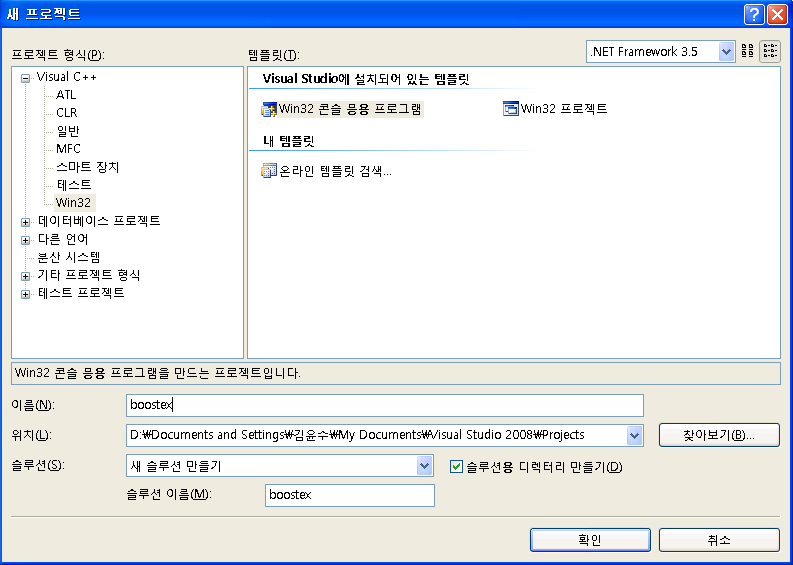
그리고 나서 다음 소스를 입력해 보세요(아래 예제는 Boost의 정규식 라이브러리를 사용하는 예제로 Boost의 정규식 라이브러리는TR1에 포함됐었고, 머지 않아 C++0x에도 포함될 예정입니다).
#include <boost/regex.hpp>
#include <iostream>
#include <string>
int main()
{
std::string line;
boost::regex pat( "^Subject: (Re: |Aw: )*(.*)" );
while (std::cin)
{
std::getline(std::cin, line);
boost::smatch matches;
if (boost::regex_match(line, matches, pat))
std::cout << matches[2] << std::endl;
}
}
솔루션을 빌드한 후 아무런 에러 없이 빌드가 완료되면 제대로 설치하신 것입니다. 테스트삼아 실행하시려면 다음과 같은 텍스트 파일을 만드신 후
(email.txt 파일 입력)
To: George Shmidlap
From: Rita Marlowe
Subject: Will Success Spoil Rock Hunter?
---
See subject.
다음과 같이 실행해 보시면 E-mail의 제목만 꺼내는 걸 확인할 수 있습니다.
D:\Documents and Settings\김윤수\My Documents\Visual Studio 2008\Projects\boostex\Debug>boostex.exe < email.txt
Will Success Spoil Rock Hunter?
그럼, Happy boosting 하세요~
'Programming > boost' 카테고리의 다른 글
| Boost 라이브러리 설치 (0) | 2012.07.22 |
|---|

