I encountered a very similar issue and found it was caused by the antivirus software. By suspending the antivirus process, I was able to work around the problem.
Try configuring your AV to "exclude" your project directory, but if that fails then you'll need to either disable or temporarily suspend the AV's process.
아직은 단순 경고라서 빌드를 계속 사용할수 있지만, 조만간에는 리젝을 하지 않을까 싶습니다.
UIWebViewIn apps that run in iOS 8 and later, use the WKWebView class instead of using UIWebView. Additionally, consider setting the WKPreferences property javaScriptEnabled to false if you render files that are not supposed to run JavaScript.
물론 UIWebView를 걷어내고 WKWebView로 바꾸면 오류가 발생하지 않습니다.
그런데 문제는 서드파티 라이브러리인데요
제가 올린 앱에도 uiwebview를 전혀사용하고 있지 않았음에도 저 메세지가 나오고 있어서
누가 문제인지 찾아보았습니다
프로젝트 폴더에서
# grep -r "UIWebView" .
로 찾아보니 firebase하고 facebook account kit이 uiwebview를 사용하고 있더라고요
다행히 facebook sdk는
5.5.0 버전의 change log를 보니 UIWebView를 WKWebView로 바꾸었다고 나오네요
firebase도 6.8.0 버전에서 UIWebView를 제거했다고 하네요
제 프로젝트의 라이브러리들이 옛날버전인것이 문제였군요.
자 이제 서드파티 라이브러리를 업데이트 해주시면 됩니다.
# pod repo update
# pod update
이 과정을 통해 최신의 라이브러리를 받긴 했습니다만
여전히 facebook accountkit이 uiwebview를 사용하고 있길래 왜그렇지 하고 살펴보니
페이스북이 uiwebview를 교체한 5.5.0 버전을 출시하긴 했는데 cocoapod에는 업데이트를 하지 않아서 그렇더라고요.
facebook sdk를 최신버전을 받아서 직접 넣거나, 페이스북이 업데이트 해주기를 기다려야겠네요.
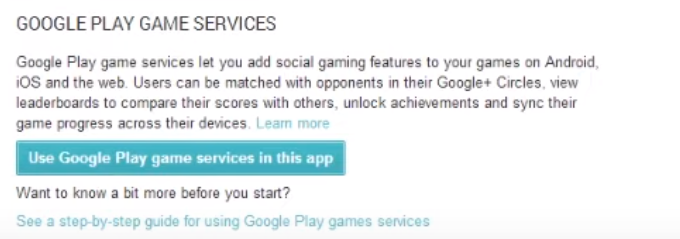
2020-02-18 01:09:43.567 4919-11220/? E/SignInAuthenticator: **** **** APP NOT CORRECTLY CONFIGURED TO USE GOOGLE PLAY GAME SERVICES **** This is usually caused by one of these reasons: **** (1) Your package name and certificate fingerprint do not match **** the client ID you registered in Developer Console. **** (2) Your App ID was incorrectly entered. **** (3) Your game settings have not been published and you are **** trying to log in with an account that is not listed as **** a test account. **** **** To help you debug, here is the information about this app **** Package name : 모자이크 **** Cert SHA1 fingerprint: 모자이크 **** App ID from manifest : 모자이크 **** **** Check that the above information matches your setup in **** Developer Console. Also, check that you're logging in with the **** right account (it should be listed in the Testers section if **** your project is not yet published). **** **** For more information, refer to the troubleshooting guide: **** http://developers.google.com/games/services/android/troubleshooting ****
This release is not compliant with the Google Play 64-bit requirement
The following APKs or App Bundles are available to 64-bit devices, but they only have 32-bit native code: 93.
Include 64-bit and 32-bit native code in your app. Use the Android App Bundle publishing format to automatically ensure that each device architecture receives only the native code it needs. This avoids increasing the overall size of your app.
- AAB는 유저 다운로드 기준 150mb가 최대이기 때문에 AAB는 165mb 정도가 최대라고 보면 된다고 함.
(유저가 다운 받을 때 15mb정도 줄어든다고 함)
- OBB는 제한을 걸었다가 다시 풀어서 글 쓰는 현재 기준으로는 기존(APK 100mb + OBB)처럼 사용가능 하다고 함.
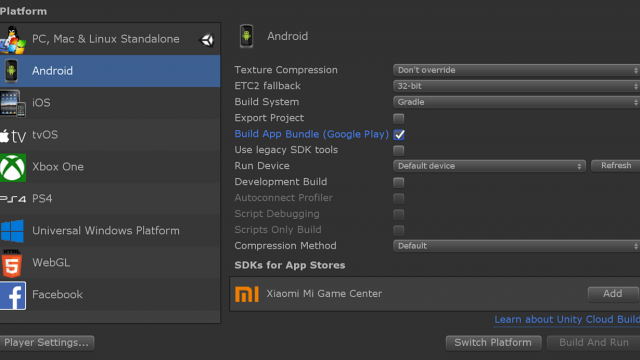
Android App Bundle 빌드하기
먼저Unity 2018.3 베타에서 프로젝트를 엽니다. APK 대신에 Android App Bundle을 빌드하려면Build Settings창(메뉴:File>Build Settings)을 열고Build App Bundle체크박스를 선택합니다(Build System은 기본 옵션인Gradle로유지).
Build를 선택하면 Google Play에 직접 퍼블리시할 수 있는 AAB 파일을 생성합니다.
Build and Run을 선택하면 AAB 파일을 생성한 다음 연결된 기기별 임시 APK 파일을 생성하여 기기에 설치하고 애플리케이션을 실행합니다.
Build를 선택하고 앱을 기기에 수동으로 설치하려면 Google에서 제공하는bundletool utility(Unity 설치 위치의 Editor/Data/PlaybackEngines/AndroidPlayer/Tools 디렉토리에 있음)를 사용할 수 있습니다. bundletool 플래그와 옵션에 대한 자세한 정보는여기에서 확인해 보세요.
참고로, 생성된 앱 번들에는 모든 지원 대상의 라이브러리가 포함되어야 하므로 앱 번들을 빌드할 때는Split APKs by target architecture(Edit>Setting>Player)옵션이 비활성화되어 있습니다.
APK 파일에는DEX(Dalvik Executable)파일 형식의 실행 가능한 바이트코드 파일이 포함됩니다.
단일 DEX 파일 내에서 참조할 수 있는 메서드의 총 개수를 65,636으로 제한하며 이 DEX 파일에는 프레임워크 메서드, 라이브러리 메서드, 본인 앱에서 정의한 메서드가 모두 포함됩니다. 즉 앱 내의 모든 메서드가 65,536개를 넘어서 이러한 에러가 발생한 것입니다. 64 * 1024의 값과 동일하며 이 제한을 64K 참조 제한이라고 합니다.
안드로이드 L (롤리팝, 5.0 API 21 ) 미만의 플랫폼 버전에서는 앱 코드 실행을 위해 Dalvik 런타임을 사용합니다. APK당 하나의 classes.dex 바이트코드 파일로 앱을 제한합니다. 이러한 제한을 해결하기 위해multidex지원 라이브러리를 사용할 수 있습니다.
안드로이드 L (롤리팝 5.0 API 21) 이상에서는 Dalvik이 아닌 ART (Android Runtime)이라는 런타임을 사용합니다. 이 런타임은 APK 파일로부터 여러 개의 DEX 파일을 로드하는 것을 지원합니다. ART는 앱 설치 시에 사전 컴파일 수행하여classesN.dex파일들을 스캔하고, 안드로이드 기기가 실행할 수 있도록.oat파일로 컴파일 합니다.
그래서 minSdkVersion21이상이라면multidex지원 라이브러리가 필요없습니다. build.gradle에 간단하게 multiDexEnabled true만 추가하면 됩니다.
multidex 속도가 느린 이유?
각 DEX 파일들을 빌드할 때 빌드 툴(buildToolsVersion)은 주 DEX 파일에 어떤 클래스들을 포함할지 고르는 아주 복잡한 의사결정을 수행하게 됩니다. 이러한 과정이 없다면 앱 실행에 필요한 클래스들이 주 DEX에 포함되어있지않아 Crash가 나기때문입니다. 그래서 이러한 과정을 거치게되는데 시간이 상당히 오래걸립니다.
네이티브 코드가 주 dex에 포함이 안되는 경우?
네이티브 코드를 사용하는 라이브러리를 포함한다고 생각해 봅시다. 그 라이브러리에서 네이티브(JNI) 코드를 사용하게되면 의사결정 과정에서 라이브러리가 구동되기위해 필요한 클래스들이 주 DEX 파일에 포함되지 않을 수 있습니다. 그럴 경우에는 multiDexKeepFile,multiDexKeepProguard를 사용해서 주 DEX에 포함시키도록 해야합니다.
빌드 최적화
위에도 써놨듯이multidex는 복잡한 의사결정을 수행하면서 빌드 시간이 상당히 커질 수 밖에 없습니다. 빌드 시간을 줄이기 위해서 빌드 사이에 multidex를 재사용하는pre-dexing을 사용할 수도 있습니다. 하지만Android 5.0 롤리팝이상인ART환경에서만 가능합니다.
Android Studio 2.3이상인 경우는IDE에서 자동으로pre-dexing을 사용하기 때문에 별도로 작성할 것은 없습니다.android studio와gradle plugin은 최신버전으로 업데이트하면 빌드 속도를 최적화하는 기능들이 추가적으로 들어있기 때문에 항상 최신버전으로 유지하는 것이 좋습니다.
multidex의 알려진 문제들.
- 단말기에 DEX 파일들을 설치할 때, 두번째 DEX 파일이 클 경우에ANR(Android Not Responding)이 발생할 수 있습니다. 이를 막기 위해서ProGuard에서 코드축소(Code Shrinking)을 해야 합니다.
- Android 5.0 롤리팝 미만에서 실행할 경우 linearalloc limit (issue 78035)이슈를 완전히 막을 수 없습니다.